180 ml of room temperature water
100 g Buckwheat Flour / true coeliacs must use gluten free version
1 pinch Salt
1 tablespoon Olive Oil Oil (for frying)
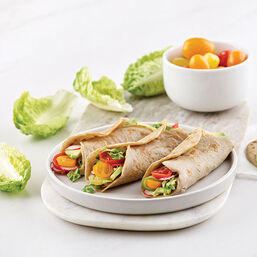
These lovely flatbreads or wraps can be used to replace breads. Fill and roll with your favourite fillings. Great for lunch boxes, BBQs, snacks, even breakfast.
Technique
- Measure the water into a jug.
- Put the flour and salt into a bowl and stir to combine.
- Add the water to the flour, a little at a time, stirring to make a smooth paste.
- Stir in the oil.
- Leave the mixture to stand for 15-20 minutes or up to 12 hours.
- Lightly oil a frying pan so that the oil just covers the surface and get the pan nice and hot.
- Stir the batter and pour half into a frying pan smoothing it out to the edge to make a large wrap.
- OR for smaller wraps, pour a quarter of the batter into the pan smoothing it into a circle 15cm/6” in diameter.
- Cook over a medium heat for 2–3 minutes as the surface starts to change colour and the edges start to lift.
- Turn the tortilla wrap over and cook the other side for 1-2 minutes.
- Transfer the tortilla wrap to a plate and cover with foil to stop it drying out.
- Repeat with the remaining batter.
- Best eaten on the day of making.
Frying pan, jug and mixing bowl
Cooking time
3-5 minutes each
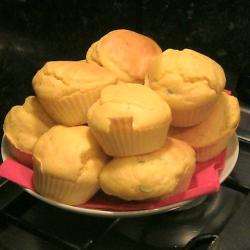
Free From Corn Bread

Ingredients
375g/13oz Gluten Free Plain Flour
225g/8oz Gluten Free Cornmeal
1 tsp Salt
4 tsp Baking Powder
110g/4oz Sugar
480ml/17fl oz Milk
2 free-range eggs
110g/4oz Butter, melted, plus extra for greasing
Small tin sweetcorn kernels, drained (or use fresh sweetcorn)
Method
- Preheat the oven to 200C/400F/Gas 6. Grease 23cm/9in square baking pan with melted butter.
- In a large bowl, combine all the ingredients together except for the sweetcorn kernels. Mix until you have the consistency of a sponge cake batter, then add the sweetcorn.
- Stir to combine thoroughly, then pour into the prepared baking pan. Bake for about 20 minutes in the top of the oven. (Alternatively, you can bake these in a muffin tray lined with paper cases.)
- The cornbread is ready when it has a golden colour and is springy to the touch. Allow to cool slightly before cutting.
Traditional Chapiti Method - Can be Free From Too

- 3 cups flour (wholemeal or white or a mixture of both. I prefer wholemeal)
- 1 teaspoon sea salt
- 200 milliliters water (250ml if you are using wholemeal flour)
- 1 tablespoon olive oil
INSTRUCTIONS
- Put the flour and salt in a large mixing bowl and mix well
- Slowly add the water and mix
- Knead the mixture to form a dough
- Pour the olive oil on top and leave to rest for at least 30 minutes
- Meanwhile sprinkle some extra flour on to a plate and start heating a large frying pan on a high heat
- Once the dough is ready divide it in to 6 portions and then follow these instructions for each dough ball:
- Take one portion, scooping up a little of the olive oil as you do, then roll it in to a ball between your palms
- Holding the small ball of dough in the palm of one hand use your other hand to pinch the sides of the ball and fold them in to the centre, moving steadily round until you’ve completed a full circle
- Put the dough ball on to the floured plate and press down with your palm so that some of the flour sticks to the dough. Turn over and repeat
- Put the dough ball on to a large board and roll it out until it forms a circle that is approximately 18cm in diameter and 3mm thick
- Then you’re supposed to toss the chapati from one palm to the other so that it stretches out a little. I found this quite tricky so cheated by stretching it out manually with my hands!
- To put the chapati in the pan place it on one palm and then flip your hand over so that the chapati falls flat in to the pan
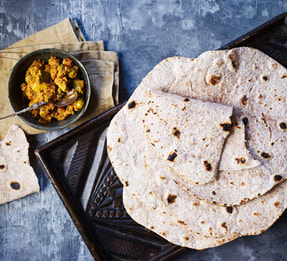
- When bubbles start to form (after approx. 20 seconds) turn it over. Press it down with a spatula so that it cooks evenly. Repeat a couple of times (for max 1 minute) so that you’re sure it’s cooked thoroughly but not too much otherwise it will become too hard. Each side should be lightly charred so that there are a few brown spots visible.
- Stack the cooked chapati on a plate covered with a tea towel so that they keep warm. They’re best eaten immediately. If they get cold they will become tough and chewy.
- If you’re making the chapati in advance you can freeze them before cooking by placing them in a stack separated by pieces of greaseproof paper. When you come to cook them from frozen they will need a few more minutes than usual.


 RSS Feed